
10 DIY tips for sculpting custom character parts with ModiBot
ModiBot has become a critical starting point for many people's creative projects, including stopmotion animation, scene photography, custom action figures, and both digital and hands-on character design.
More and more, creators want to design and sculpt their own ModiBot-compatible parts. This is the best place to start.

1. Match the correct ModiBot kit to your sculpting material
Not all ModiBots work with certain materials. Once you have determined what material you'd like to sculpt with, it's best to choose the ModiBot kit that supports sculpting that those materials. **Its possible that there is no ModiBot kit to support the material you are most familiar with.
CAUTION: Avoid using oil or plastic-based clays with the classic MO kit because these will make the plastic (especially the joints) brittle and prone to breakage.
ModiBot Mo, the original ModiBot kit, is made of PETG plastic like water and soda bottles. Its a tough durable plastic, but it doesn't react well to the chemicals or solvents in some sculpting materials.
Original Mo kit works best with- 2-part epoxy, Masking or washi tape, 3Doodler or other handheld 3d filament extruders.
ModiBot Mo+ (plus) kit is made of durable polypropylene plastic and is more durable when used with some paints and solvents. This toughness, especially when heated, allows Mo+ kits to be used with polyclay and a wider variety of materials.
Mo+ works best with- Polyclay compounds (like Fimo or Sculpey), 2-part epoxy, masking or washi tape, 3Doodler
2. Assemble and test all your joints before starting
Ball joints create a lot of pressure on their first assembly. Make sure you assemble the figure and test the movement of all the joints prior to sculpting. This will prevent you from starting a sculpt on a part that is already broken or weak.
BONUS TIP: If a part cracks or breaks during assembly, no worries, we will replace them. Contact us at mo@modibot.com with a picture of your broken part (so we know exactly which part and color you need) and your shipping address. We'll get a replacement out in the mail to you asap!

3. Try a test part to get a feel for your materials and process
ModiBot Mo and Mo+ kits both come with extra ball and socket parts so you can try your hand before committing to a single body part. This is especially smart for working on epoxy and polyclay projects due to the amount of time you will commit to the project. T
BONUS TIP: These extra ball and socket parts can also be used to create your own designs for heads, hands, feet or even large elements like extra arms or wings!
4. Consider the size and weight of your pieces
ModiBot joints are strong and durable when assembled, but they have a limit to their ability. Creating excessively long or heavy parts can reduce the effectiveness of each joint. A general rule of thumb is- the longer the part, the more you should reduce its weight.
If your are considering large, dynamic parts like long arms or wings, do some testing with materials to make the part weight more manageable. Aluminum foil or wire can be a simple way to create structure or mass without creating a lot of weight.
BONUS TIP: Large hands/feet or hand-held accessories can put the most stress on your ModiBot joints. Consider fabricating large accessories with balsa wood or styrene

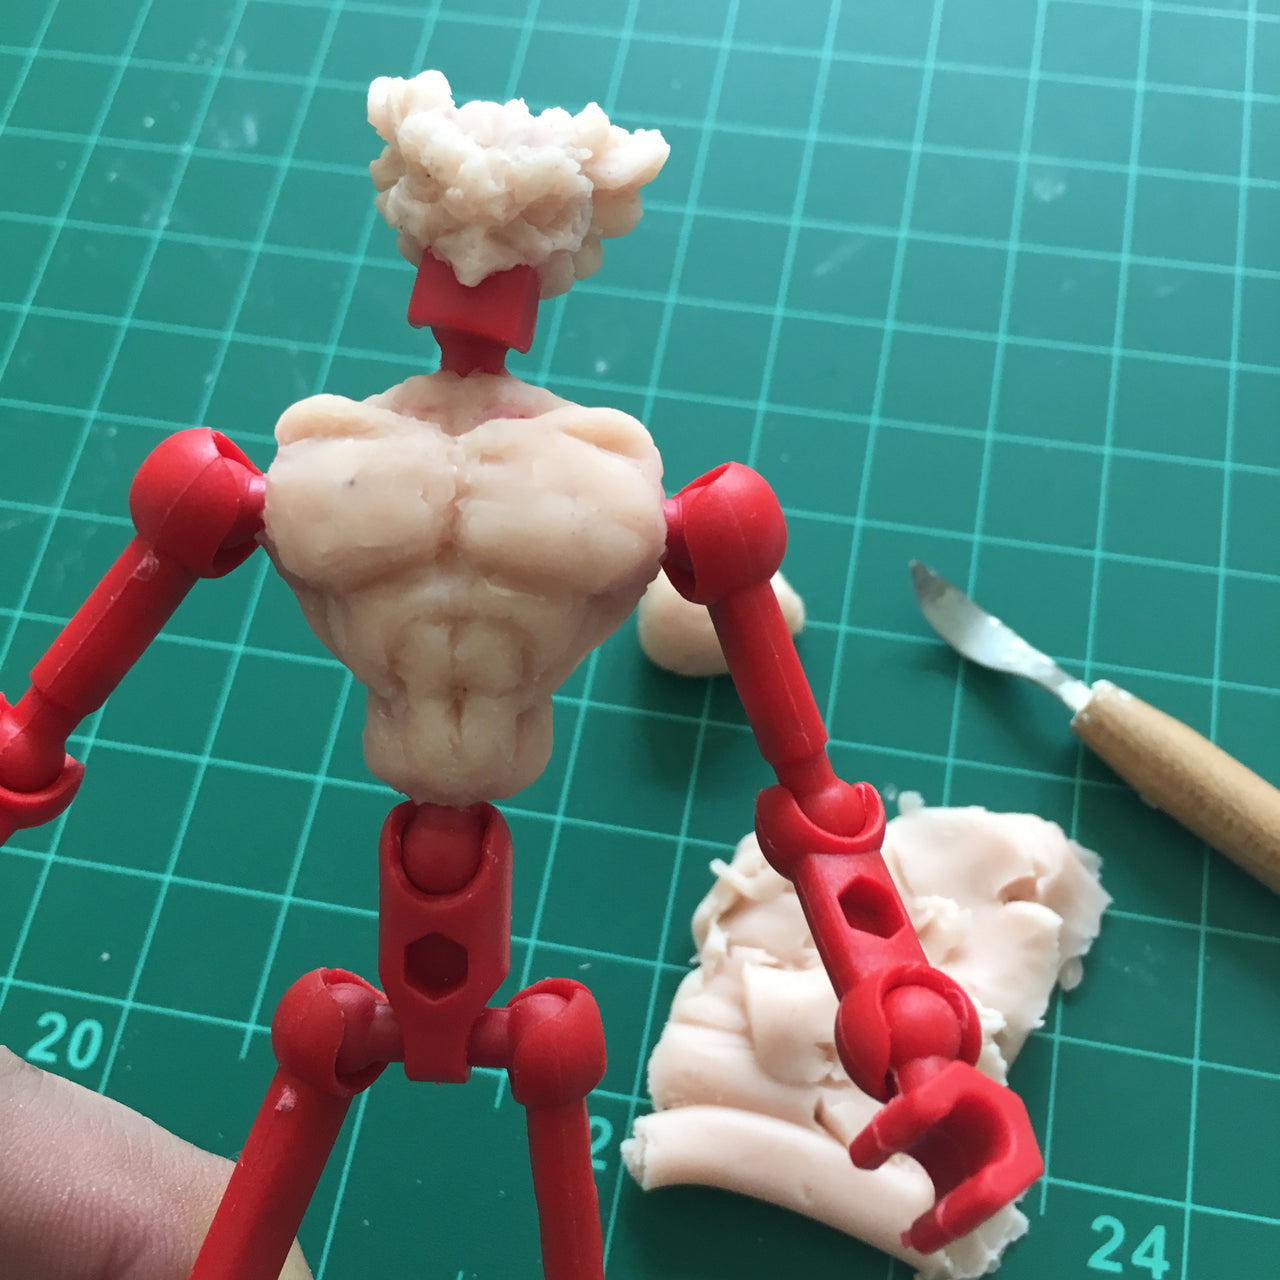
5. Work each sculpted part as a separate element
Most sculpting is worked as a single integral piece. If you are wanting to maintain the movement of the joints, it's best to work each part as a singular element. This approach makes it a bit tougher to see how the entire sculpt will look, but it will prevent you from destroying a bunch of work as you try to unsnap connected parts.

6. Work in layers
Developing a process is important, and one of the most important ways to manage the work is to take small steps, this will allow you to make improvements and modifications as you go vs. trying to get each part right on the first try.
Working slowly allows you to work the entire design more as a whole than by finishing each part and then moving on to the next.
BONUS TIP: One additional benefit of working in layers is that you can start with a rough sculpt of each part to get a feel for the proportion of the piece. Roughing out your design in bunched up aluminum foil can help you get a feel for each part's size and proportion.

7. Allow clearance for sockets to flex
Its best to leave room around the sockets so they can flex as you assemble the joints. When you bury the sockets in dense material it can prevent you from assembling all your work. Its best to leave at least 1-3 mm of socket material showing surrounding each joint.
BONUS TIP: Be careful of making your sculpt too thin surrounding your sockets. Some materials may not be as flexible as the socket material, causing thin layers of material to crack and flake-off during part assembly.
8. Do Not bake parts while assembled
If you are using polyclay and heating your parts, the most important thing to remember is- DO NOT BAKE YOUR PARTS WHILE THEY ARE ASSEMBLED. This WILL stretch your joints and prevent them from maintaining a tight grip. No one wants floppy joints (unless you are trying to make a marionette that is. ;)
BONUS TIP: If you are sculpting figures WITHOUT joints, ModiBot Mo+ works great as a full-figure sculpting armature. This approach allows you to define a great pose using the Mo figure and then burying Mo inside of a full-body sculpt. If you choose to work this way, it can be best to define your pose and then use some glue to 'lock' the joints in place before adding your sculpting medium.
9. Always bake parts at the recommended temperature
The ModiBot Mo+ kit has been tested to around 280 degrees F. When sculpting in polyclay, follow the recommended baking instructions for your material type. Using a heat gun or baking the parts at higher temperatures could damage the look and/or function of the parts. For best results, avoid over-heating the parts.
WARNING!: Use extreme caution when using an oven. Handling hot parts can cause burns. Use tongs or an oven mitt when handling hot parts.
10. Whooops! Salvaging a part
Accidents happen. Parts may get dropped and crack, joints may get over-stretched or we may just find out that the part we made is too heavy to allow the joints to remain posable. When those accidents happen, you should try to save the work you have done.
It's possible to cut a ModiBot part out of the original sculpt by carefully using plastic snips. Cutting off one end of the part (socket or ball) can allow you too free the sculpted piece from the ModiBot armature. In some cases you may be able to cut the part in half using a small modeling or coping saw. Its best to use a vise and hand protection when separating a sculpt from its armature.
Once you have freed the sculpted portion you can make modifications and reattach to another ModiBot part.
Thanks for tuning-in. Watch this space for more creative project tips and best of luck on your next project!
Leave a comment: